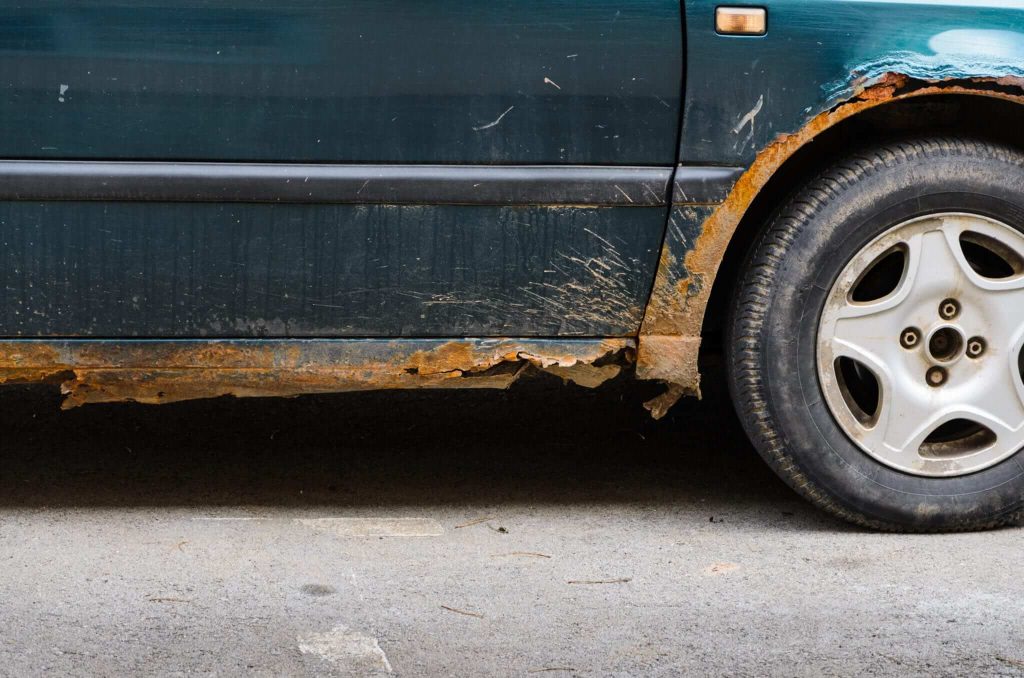
It’s inevitable. The old saying should be “nothing is certain but death, taxes and rust on the sheet metal of your vehicle”. And that’s especially true here in Toronto’s often damp climate and salt-strewn winter roads.
Rust can cut short the lifespan of your car. You’ll need to replace it sooner and that costs you money. But you can keep your vehicle on the road for longer by learning how to fix rust on a car.
7 STEPS TO FIX RUST SPOTS ON YOUR VEHICLE
As with any work you do on a vehicle, you need to take a safety-first approach to rust repair.
Before we begin, you should know that it’s best to indoors in a well-lit, well-ventilated garage. And be prepared for at least a full day to get the job done.
Step 1 – Gather the Right Tools & Materials
You may have many of the following in your toolbox already. Those you don’t have are readily available at your local hardware or auto parts store.
- Respirator mask and safety goggles
- A circular power sander or drill with a sanding disk
- Hammer
- The correct colour of automotive paint. You can find the paint code for your vehicle on the vehicle manufacturer’s sticker, which is usually found on the driver’s side door jamb. It might also be on the VIN plate at the bottom of the windshield, glove box, passenger sun visor, trunk lid or floor, or on the spare wheel cover.
- Rust-resistant automotive paint primer – etching primer is best
- Automotive clear coat
- A variety of 80 to 400 grit sandpaper and a sanding block
- A grinding wheel
- Auto body filler
Step 2 – Get Yourself Ready
Wear a long-sleeved work shirt and pants. Keep your safety goggles on throughout the entire process and use the respirator mask whenever you’re grinding/sanding the metal and working with the paint and/or primer. Even surface rust can chip and cause an injury.
Step 3 – Mask Around the Area You’re Treating
Use masking tape and newspaper to cover the everything around the rust spot you want to remove. Leave a few inches of space between the edge of the spot and where the mask begins. Don’t skimp on the masking. Spray primer and paint mist can travel far through the air.
Step 4 – Remove Rust & the Paint Around It
Depending on the severity of the rust, use the sandpaper, sanding block or power sander to sand the rust and the paint around it to the bare metal. If you need to fill a hole left by the rust, first paint the area around the hole with etching primer and let it dry. Then mix the body filler according to the instructions on the package and fill the hole. Shape it as best you can to the shape of the body panel. Let it harden completely.
Step 5 – Sand & Paint Area With Primer
Using a 150 grit paper, sand the area smooth. It would help to sand it a second time with 200 grit paper. Wipe the sanded area to remove dust and debris. When it is dry, apply a base coat of paint primer in a thin layer, let it dry and sand it with 200 grit paper to keep the surface smooth. Repeat the primer/sanding process up to three times. After your final application, sand the area with 400 grit paper. Wipe the area clean of dust and debris when you’re done.
Step 6 – Paint the Area
When the area is clean and dry you can apply the paint. Apply thin layers and avoid a build-up of paint. Let the paint job dry, sand it with 400 grit paper and clean the area. Repeat the paint/sanding/cleaning process three times.
Step 7 – Apply the Clear Coat
Once the area is clean and dry, apply the clear coat according to the instructions on the paint can.
You can use a similar process to repair minor scratches on your vehicle’s body too. Or why not get professional car scratch repair in Toronto right here at Leons Auto Body shop?
If you liked this post check out our recent articles on how to take care of leather seats and how to take care of your car during winter.