After we told you last time about the best way to wash your car while protecting its paint finish, we realized we didn’t quite finish the job. To give your paint finish as much protection as possible, you should follow washing your car with an application of wax at least twice a year.
Long ago, wax was just about the only thing between the car’s paint and the elements that ravage it. Today’s finishes have clear coats for that. But waxing is still important because it helps ‘take the hit’ for the clearcoat in a lot of cases.
As simple as ‘waxing the car’ sounds, many car owners don’t wax their cars in entirely the right way. The problems can end up leaving the wax streaky, smudged on vinyl or rubber body parts, and not offering as much protection as possible.
THE RIGHT WAY TO WAX YOUR VEHICLE’S BODY PANELS
Use the tips below to wax your car properly and maximize the protection of the paint finish.
1. THOROUGHLY WASH THE CAR
We gave you tips for giving your car a good wash in the last post, but we wanted to mention it here again so everyone knows that the car should be as clean as possible before polishing and waxing.
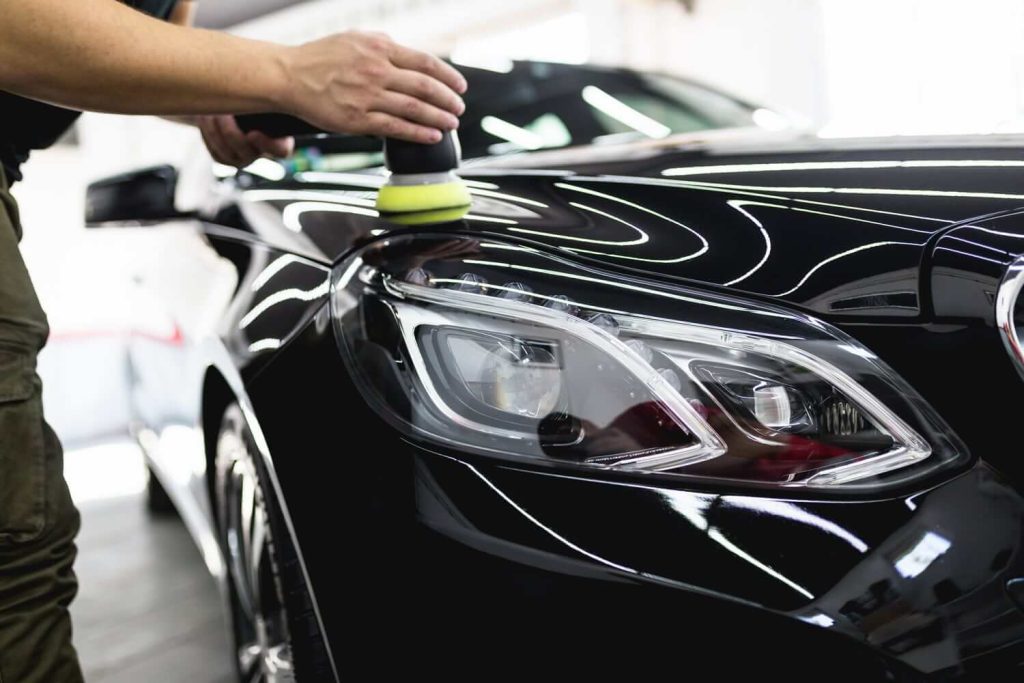
2. GET YOUR WAX KIT TOGETHER
First, get a good quality car polish and separate wax. This isn’t a good place to nickel and dime yourself. You may be doing a lot of rubbing, and getting very little benefit just to save some money. You’re going to need lots of soft, clean cotton cloths too.
Unless you’ve worked with a power buffer before, use good old elbow grease. You don’t want to learn power buffing on your car.
3. PROTECT THE TRIM
One of the telltale signs of a bad wax application is when you see the wax dried onto unpainted trim around the car. To help prevent that and to protect the trim, use a vinyl protectant. So you don’t end up getting protectant on the body of the car, spray the protectant onto your cloth, then wipe the trim.
4. POLISH THE CAR
This is the missing link in most people’s approach to waxing the car. They go straight from wash to wax. But a clean finish is still full of tiny scratches and oxidation that gets sealed-in if you don’t polish the car first. You may need a rubbing compound for deeper scratches and heavier oxidation. But, generally, you should use a fine grit polish.
5. POLISH AND WAX IN THE SHADE
After rubbing them on, both wax and polish should be removed before they dry. In the sun, that can dry almost instantly. Polishing and waxing in the shade gives you a few minutes to wipe off the compounds.
6. APPLY WAX IN THIN LAYERS
Nope. More wax doesn’t mean more protection. In fact, a thin layer of wax bonds and cures better. Apply wax directly to a clean cotton cloth and use good pressure to rub it into the paint finish.
7. DO ONE SECTION AT A TIME
This helps you remove the wax before it dries entirely and it helps you keep track of where you’ve waxed and where you haven’t.
8. APPLY AND REMOVE WAX IN STRAIGHT LINES
If you’ve always applied and removed wax using circular motion, don’t worry. This isn’t crucial. But when you remove the wax, it can be difficult to get it all. It can leave light streaking. Circular streaks are more noticeable than horizontal ones.
Washing, polishing and waxing is great for the paint finish of your car. But if you want it to look like new again, contact us here at Leons.